Metal rebar adhesive injection gun

Other products

Metal rebar adhesive injection gun

25

The metal rebar adhesive injection gun is specifically designed for injecting two-component adhesives used in rebar anchoring applications. This tool features a durable metal body that enhances its strength and longevity. Suitable adhesives for use with this gun include 345 ml cartridges such as Memo 345 and Calm 345, as well as 390 ml cartridges like FIS EM PLUS from Fischer Germany
Sharing:
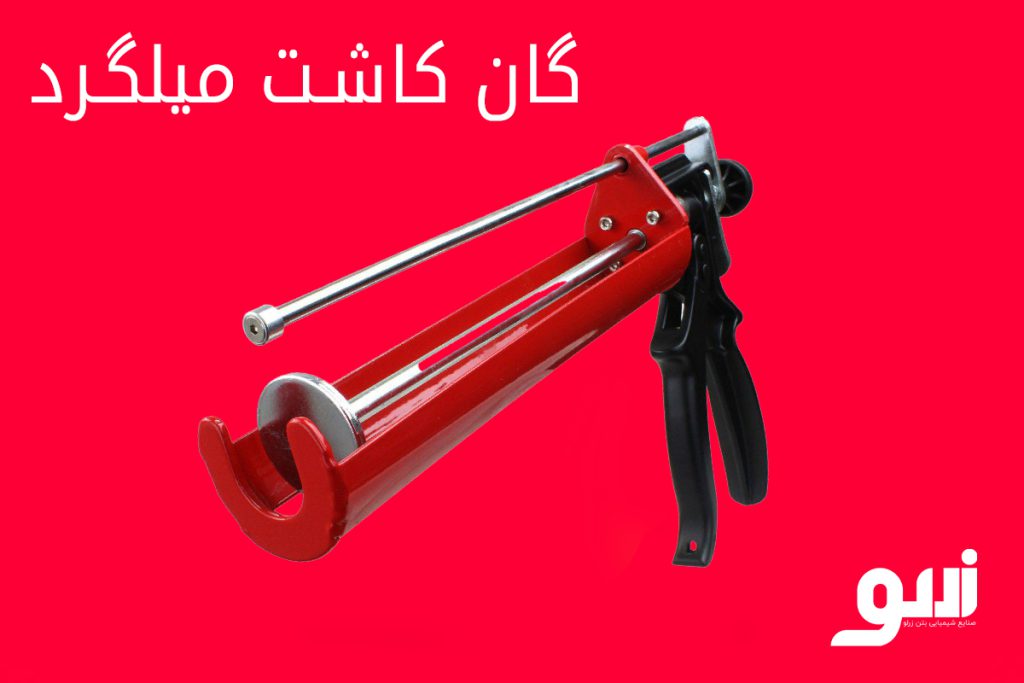
Metal Rebar Adhesive Injection Gun A metal rebar adhesive injection gun is a manual or industrial tool used for the uniform injection of two-component adhesives (resin and hardener) into drilled holes in concrete. These guns feature a durable metal body, dual pistons, and a high-pressure lever. By installing a specialized cartridge, the adhesive is simultaneously mixed and injected. This tool is essential for the precise and reliable installation of rebars or anchors in structural reinforcement operations

Physical Specifications

  • Body Material: Primarily constructed from hardened metal (steel, aluminum, or corrosion-resistant alloys). Designed to withstand high pressure during adhesive injection.
  • Weight: Typically ranges between 1 to 3 kilograms, depending on the size and type of the gun.
  • Dimensions: Adapted to fit adhesive cartridges of various sizes (commonly 345ml, 400ml, or 585ml). Larger industrial guns are built to accommodate 585ml cartridges.
  • Mechanical Design: Equipped with a high-pressure lever, synchronized dual pistons (for simultaneous pressure on both adhesive components), and an ergonomic handle. Often utilizes a gear or ratchet system for precise pressure control.
  • Nozzle Connection: Compatible with spiral mixing nozzles for blending resin and hardener during injection.
  • Surface Coating: Some models feature anti-corrosion coatings such as galvanization or electrostatic paint.
Steps for Using an Adhesive Injection Gun
  1. Preparing the Adhesive Cartridge:
    Remove the two-component cartridge from its packaging.
    Open both ends of the cartridge (if sealed).
    Attach the spiral mixer nozzle to the cartridge outlet and lock it in place.
    Insert the cartridge into the metal gun chamber.
  2. Installing the Cartridge into the Gun:
    Slide the cartridge into the metal gun.
    Gently pull back the pressure handle (lever) to position the piston at the starting point.
    Then press the handle to allow both components to enter the nozzle simultaneously.
  3. Dispensing Excess Initial Material:
    Dispense a small amount of adhesive (about 10–15 cm) onto paper or a disposable surface.
    This ensures the resin and hardener are fully mixed inside the spiral nozzle.
  4. Injecting Adhesive into the Concrete Hole:
    Insert the gun nozzle all the way to the bottom of the hole.
    Slowly press the gun trigger while gradually pulling the nozzle back.
    This ensures the hole is completely filled with adhesive and prevents air bubbles.
  5. Placing the Rebar:
    Immediately after injecting the adhesive, gently rotate and insert the rebar into the hole.
    The rebar should reach the bottom and be fully embedded in the adhesive.
  6. Cleaning the Gun:
    After finishing the work, remove the cartridge from the gun.
    If reuse is needed on the same day, replace the nozzle and keep the gun clean.
    If adhesive dries inside the gun, it may damage the metal components.